

-

- About 30 minutes
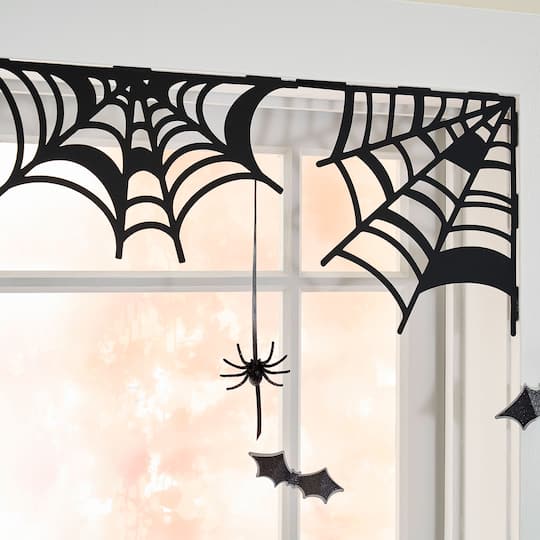
spider web halloween décor
Use matboard from cuttable surfaces to make spooky Halloween décor; then add spiders (and maybe even bats)!
| Step 1 |
First, click here for the design in Cricut® Design Space™. |
| Step 2 |
Now, click ‘Make It’ in the upper right corner of your screen and ‘Continue’ in the lower right corner of the next screen. |
| Step 3 |
Place the material for your first cut onto your cutting mat. |
| Step 4 |
Select your material and load your mat into your Cricut® machine. Follow prompts to score/cut your material. |
| Step 5 |
Unload and gently remove the material from the cutting mat. Remove any pieces left around or within the cutout and discard. |
| Step 6 |
Repeat Steps 3-5 for each mat layer. |
| Step 7 |
Fold your glitter bats and offset shadow along the score lines. Attach the glitter bats on top of the shadows with a tape runner. |
| Step 8 |
Use hot glue to attach spiders (and bats) to your spider webs. |
| Step 9 |
Fold the tabs back on your spider webs. Attach Glue Dots® onto each tab and attach to your wall. |
-

-

-
 809188527You’ll Need: 1Item # 10142583
Promotions
$3.49- Color: Ebony
- Size: 12" x 12"
- Color: Ebony
- Size: 12" x 12"
- Color: Ebony
- Size: 12" x 12"
-

-
 809188527You’ll Need: 1Item # 10684179
Promotions
$1.29ea.- Color: Slate
- Size: 12" x 12"
- Color: Slate
- Size: 12" x 12"
- Color: Slate
- Size: 12" x 12"
Products
-

-

-

-

-
 You’ll Need: 1Item # 10669040
Promotions
$549.99
Products
- Computer
| Step 1 |
First, click here for the design in Cricut® Design Space™. |
| Step 2 |
Now, click ‘Make It’ in the upper right corner of your screen and ‘Continue’ in the lower right corner of the next screen. |
| Step 3 |
Place the material for your first cut onto your cutting mat. |
| Step 4 |
Select your material and load your mat into your Cricut® machine. Follow prompts to score/cut your material. |
| Step 5 |
Unload and gently remove the material from the cutting mat. Remove any pieces left around or within the cutout and discard. |
| Step 6 |
Repeat Steps 3-5 for each mat layer. |
| Step 7 |
Fold your glitter bats and offset shadow along the score lines. Attach the glitter bats on top of the shadows with a tape runner. |
| Step 8 |
Use hot glue to attach spiders (and bats) to your spider webs. |
| Step 9 |
Fold the tabs back on your spider webs. Attach Glue Dots® onto each tab and attach to your wall. |